
Proper maintenance of your Ryobi trimmer can help extend its life, improve performance, and prevent malfunctions. If you want to know how to replace the Ryobi trimmer head, keep reading. We researched this question and have an answer for you.
Replacing the Ryobi trimmer head is easy. Just follow these simple steps:
- Prepare your tools, including a flat-head screwdriver and trimmer head replacement.
- Detach the old trimmer head with the screwdriver.
- Attach and tighten the new trimmer head.
We'll cover each step in detail in this post. We'll also share tips for fixing other issues with the Ryobi trimmer.
How To Replace A Ryobi Trimmer Head
The Ryobi trimmer head will need replacing if it wears out or gets damaged. Replacing the Ryobi trimmer head is easy. Here's how:
Prepare The Tools
- Small flat-head screwdriver
- Trimmer head replacement
You will need the small flat-head screwdriver for detaching the old trimmer head and attaching the new one. Make sure the tip of the screwdriver fits the trimmer head slot.
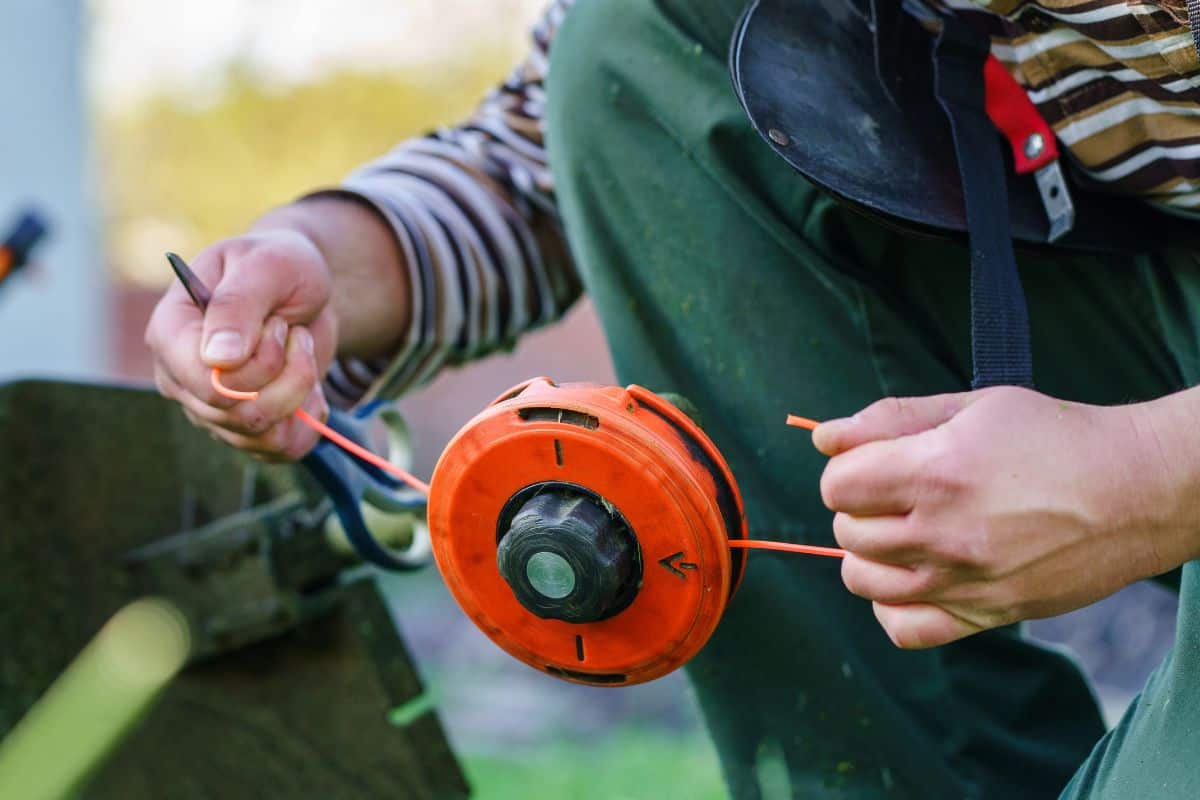
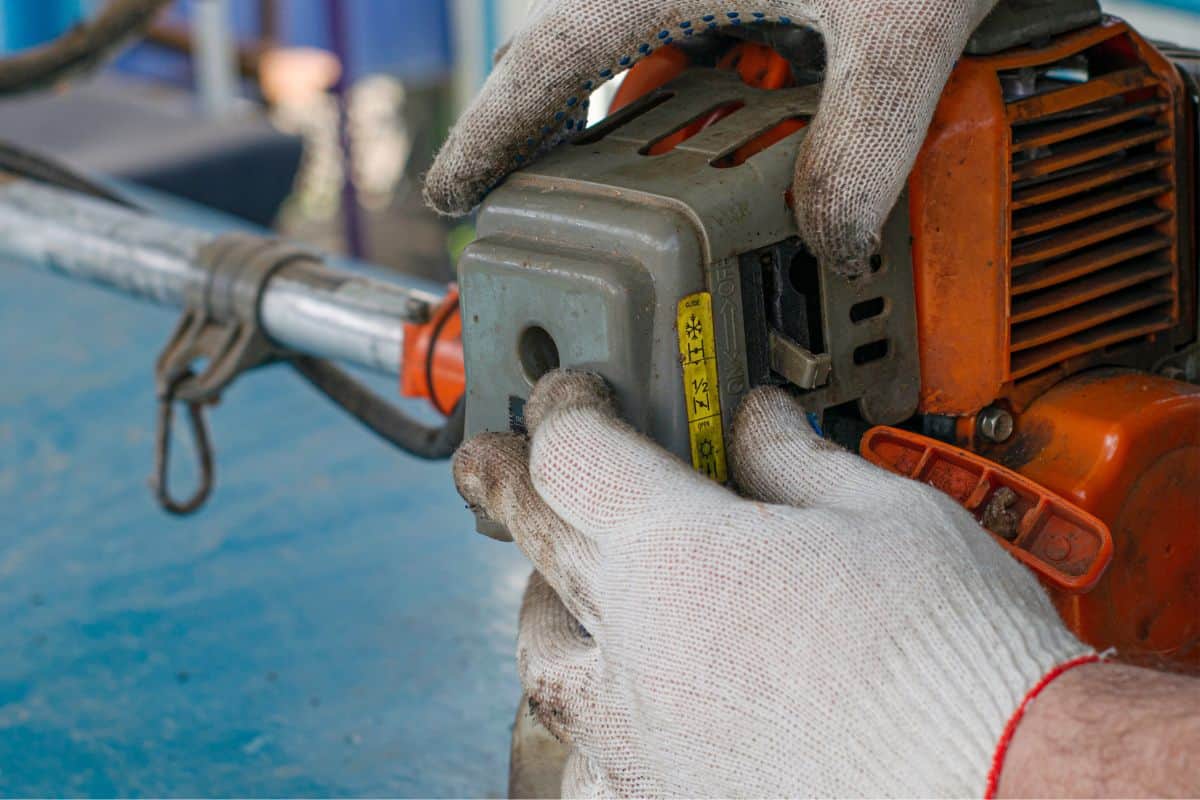
Detach The Old Trimmer Head
Position the slot of the flanged washer over the slot in the gear case and slip the flat-head screwdriver into the space. Then rotate the old trimmer head clockwise to remove it.
Attach The New Trimmer Head
Get the new trimmer head and insert the flanged washer. Attach the head by rotating it counterclockwise.
Line up the slot of the new trimmer head with the gear case slot and slip the screwdriver into the space. Then rotate the trimmer head to secure it in place.
You can watch the video below for a demonstration of how to replace the Ryobi trimmer head.
Why Won't My Ryobi String Trimmer Head Spin?
Here are some of the common reasons a string trimmer head won't spin:
Clutch Problems
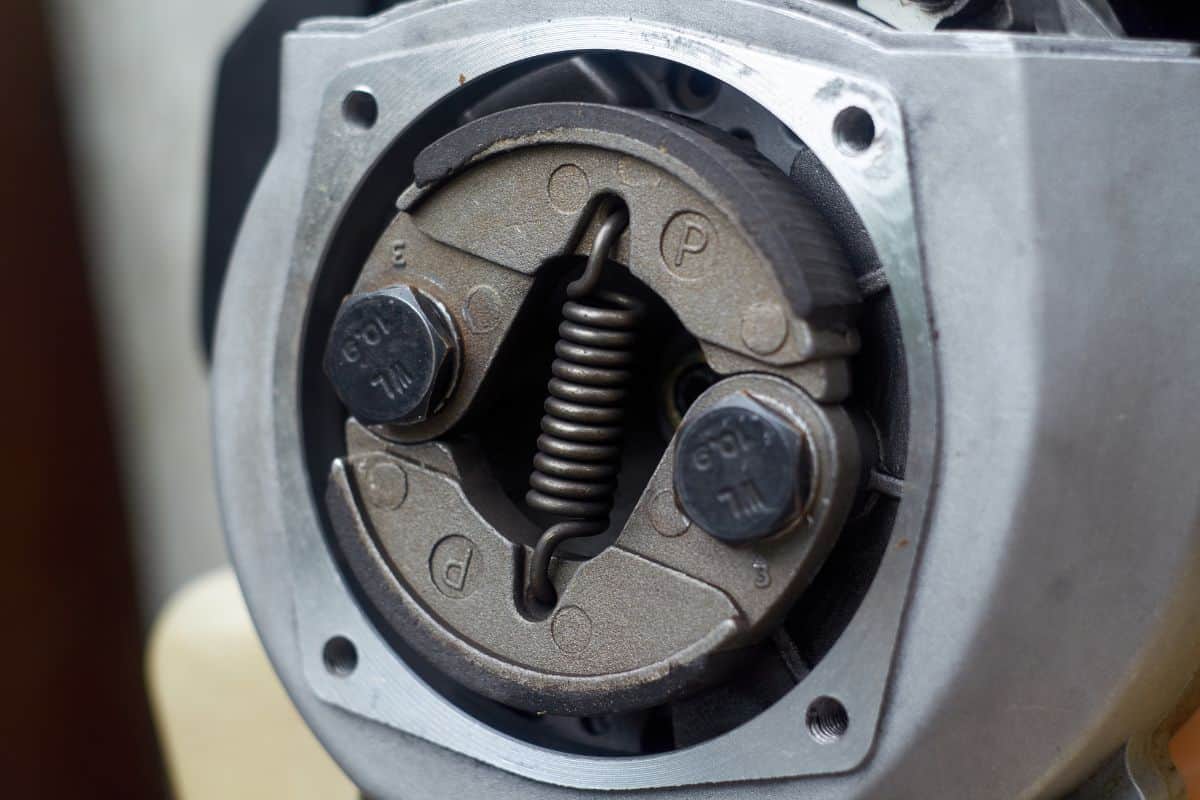
The trimmer head can jam up if the clutch assembly is worn out or damaged. A damaged clutch assembly can't make the drive shaft spin the trimmer head. Cleaning and repairing the clutch assembly may work. You can also replace it—an easy and inexpensive option.

Click here to see this clutch assembly on Amazon.
Damaged Trimmer Head
The trimmer head will not spin if it's defective or damaged. If the drive shaft thread gets stripped, it won't stay on the rod. You will need to replace both the drive shaft and the trimmer head in this case.
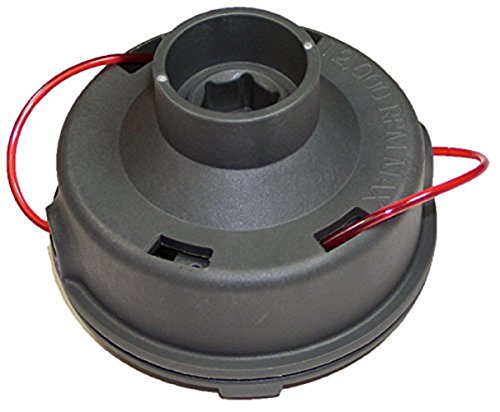
Click here to see this trimmer replacement head on Amazon.
Damaged Throttle Cable
The engine won't accelerate if the throttle cable is deficient. If this is the cause of the problem, the trimmer head won't spin. You will need to replace the damaged throttle cable with a new one to resolve this issue.
Make sure you get parts that are compatible with the model of your Ryobi trimmer.

Click here to see this throttle cable on Amazon.
You can check out this video for more details on Ryobi trimmer head spinning issues.
Why Won't My Ryobi String Trimmer Start?
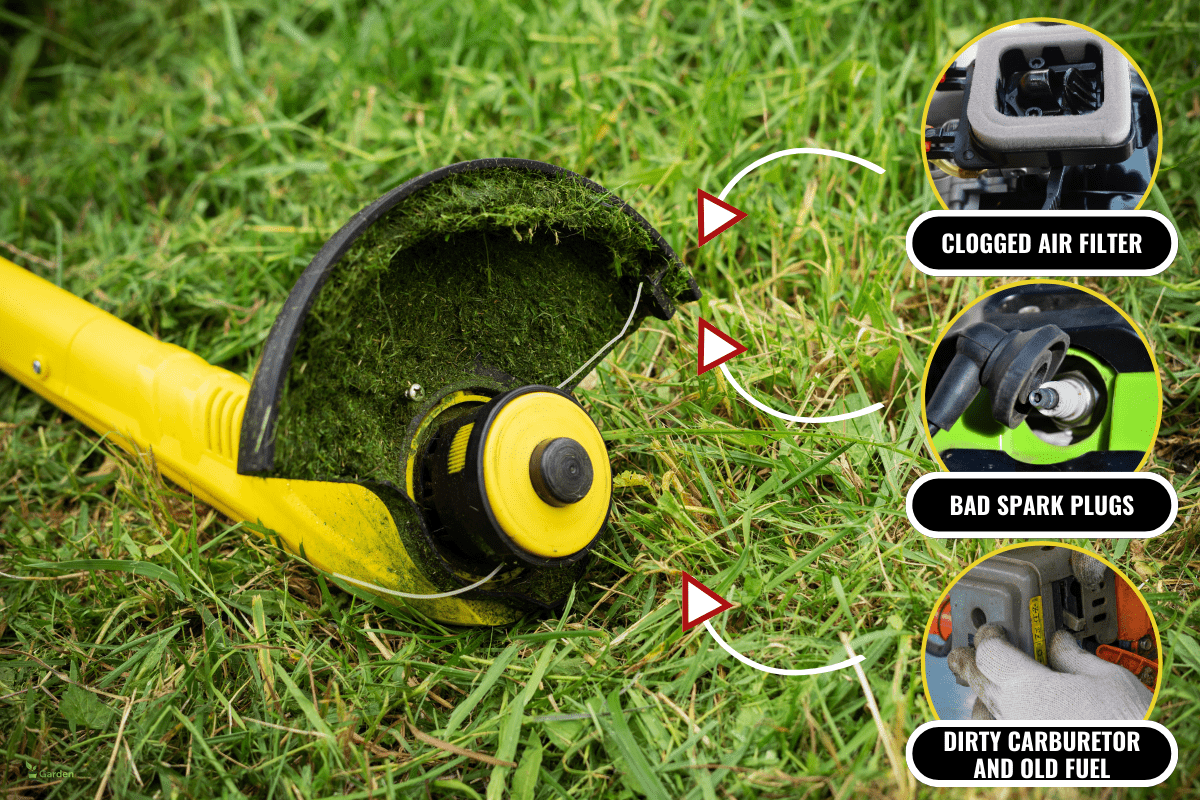
There are several reasons why a Ryobi string trimmer won't start. Some common issues and how to fix them are listed below:
Clogged Air Filter
Maintaining the air filter can help prolong the life of your string trimmer. Debris and clogged dirt can damage the trimmer, so it's important to inspect the filter for any defects or obstructions. You should clean and replace the Ryobi filter regularly for better performance.
Here are the steps for replacing the air filter:
- Remove the screws and rear cover of the engine.
- Take the old air filter out of the back cover.
- Remove the center foam from the new air filter.
- Put the new filter in a plastic bag and add a few drops of two-cycle engine oil.
- Gently squeeze and twist the bag so that the filter absorbs the oil.
- Take the air filter out of the bag and wipe away excess oil with a rag.
- Place the air filter in the engine rear cover and put the cover back on securely.
Bad Spark Plugs
A bad spark plug may keep the trimmer from starting or cause a misfire. You may need to replace the spark plug for better performance and to avoid further damage.
Here is how to replace the spark plug:
- Take the spark plug boot out and use a wrench to loosen the spark plug.
- Take the spark plug out from the head of the cylinder.
- Set the gap between the metal strap and the central electrode. You can use a spark plug gapping tool to measure the distance. Adjust the gap up to 0.026 inches.
- Install the new spark plug in the head of the cylinder and use a wrench to tighten it.
- Reinstall the spark plug boot.

Click here to see this tool on Amazon.
Dirty Carburetor and Old Fuel
The carburetor sends fuel and air to your trimmer's engine. Dirt can build up and clog the carburetor. The trimmer's engine may then experience problems with starting.
Old fuel can also lead to a clog if it stays in the trimmer. Using the wrong oil and the wrong fuel mix are other reasons a trimmer won't fire up. Replacing the carburetor, fuel filter, and fuel line may be necessary to get the trimmer running again.
Here are the steps for replacement:
Removing Old Carburetor
- Take the back cover off the engine by removing the screws and then take out the carburetor.
- Empty the fuel tank.
- Take the screws out of the carburetor assembly. Then take out the choker assembly and choker plate.
- Disengage the throttle cable.
- Disconnect the two fuel lines from the carburetor with your hands or with pliers.
- Take out the carburetor.
Replacing The Fuel Filter And Fuel Line
- Move the plastic washer on the outlet at the bottom of the fuel tank.
- With wire cutters, cut the fuel filter so that it's flush with the fuel tank.
- With a screwdriver, push the rest of the fuel filter into the fuel tank.
- Turn the trimmer upside-down to let the fuel filter falls from the tank. Install the new fuel line and filter.
- Cut a taper at the end of the new fuel line and lubricate the exterior of the line with engine oil.
- Pass the tapered end of the fuel line through the mounting hole in the tank until the nipple of the fuel filter is nested in the mounting hole.
- Push down the plastic part of the fuel filter with large screwdriver and pull the fuel line until it is nested in the mounting hole.
- Put the plastic washer onto the new fuel filter line.
- Slide the washer over the filter nipple with pliers.
- Insert the fuel line's tapered end in the opening behind the carburetor mounting assembly.
- Cut the taper off the line for connection to the carburetor.

Click here to see this fuel filter on Amazon.
Installing The New Carburetor
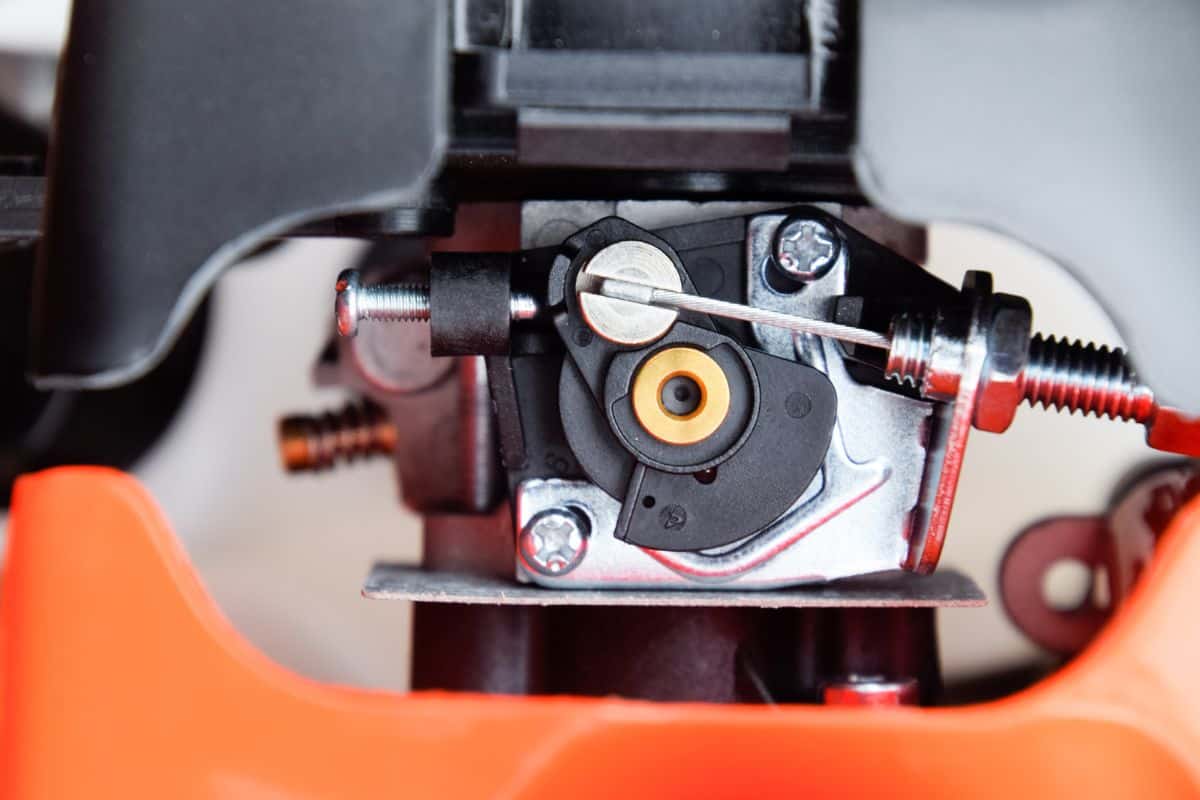
- Attach the new carburetor gasket. Put the throttle cable on the throttle linkage.
- Affix the incoming fuel line into the lower inlet. Install the primer fuel line to the upper inlet.
- Attach the mounting screws to the lever and choker plate.
- Attach the choker plate and carburetor to the engine with screws..
- Put the back cover on the engine using the screws, making sure they're tight.

Click here to see this carburetor kit on Amazon.
Summing Up
Replacing the old parts on your Ryobi trimmer, such as the trimmer head, the carburetor, and the air and fuel filters, can help maintain the machine's functionality. You should schedule a regular inspection to prevent equipment problems in the future.
Check out our other posts about Ryobi equipment below:
How To Use A Ryobi Hedge Trimmer [Step By Step Guide]
How To Use A Ryobi Edger [Step-By-Step Guide]