
![Stone Garden Edging [Step-By-Step Guide, Picture Ideas and More]](https://gardentabs.com/wp-content/uploads/2019/09/Stone-Garden-Edging-Step-By-Step-Guide-Picture-Ideas-and-More.jpg) A garden is a popular choice for upgrading the landscaping outside homes and businesses. When finishing a garden, then, you want a clean and polished look rather than a sudden end to the area. This clearly defines the garden space from the rest of the yard. It's also useful as a way to:
A garden is a popular choice for upgrading the landscaping outside homes and businesses. When finishing a garden, then, you want a clean and polished look rather than a sudden end to the area. This clearly defines the garden space from the rest of the yard. It's also useful as a way to:
- Make it easier to cut your grass without worrying about getting too close to the garden plants
- Keep the mulch and plants in the garden
- Add an extra bit of decor to your garden
Stone is a very versatile material when used in garden edging and can create a good many different looks. Setting stone in mortar makes for a more formal look in your garden, while simply placing stones around the outer edge of the garden gives a more relaxed and casual vibe.
We've gathered plenty of information for you about stone edging. Keep reading to find out everything you need to know about how to use stone edging to create a gorgeous finish to your garden!
Types of Stone Edging
There are many different types of stone edging available for use in a garden. Each type has its own unique look and feel that it can add to a garden's overall design. Consider what you want to use the stone for and the complexity of your edging design as you read further to learn more about the different types of stone available.
Cut Stone
Cut stone used in garden edging is made from large amounts of stone that have been machine-cut into bricks. This allows you to create many different designs in your edging. This type of stone edging is a bit expensive, but it's durable and will last for many years.
You can create a wall border using this type of stone stacked on top of each other. You can also use mortar to bind the stones and create a more stable edge.
It also needs little maintenance with only the occasional weeds growing between stones. This edging is fairly heavy, however, and you may want to consider hiring a professional to install it correctly.
Slate Garden Edging
Slate is a slab of layered sediment rock that's bluish-grey in color. It's flat rather than round and can have both irregular surfaces as well as smooth surfaces.
These stones can be used to easily create a higher edge than one at ground level. You can stack the flat stones one on top of the other to build a wall of sorts without having to resort to using mortar.
You can also use smaller pieces, or chips, and stack them on their sides to create a unique garden edge. This is a great choice to give your garden a clearly defined edge that has very little maintenance needed.
However, slate can occasionally slake off, or shed, layers. This can be frustrating, especially when the slate stones are stacked, as it can make the wall unstable.
River Rock Edging
River rock, or rock mulch, as it's occasionally called, is another good choice for a garden edge. River rocks are stones smoothed by running water that come in a variety of colors, sizes, and shapes which allows homeowners to customize their garden easily.
It's easy to line a more complicated garden edge with river rock since you simply pour it along your chosen path. You do need to make sure and use a landscaping fabric underneath these rocks, however, to slow the growth of weeds.
This type of stone border is also more likely to get caught by a lawnmower and shot across the yard, however, so consider carefully when using it as a border.

To find this selection of river rock on Amazon, click here.
Pebbles
Pebbles are similar to river rock in that they are smaller, smooth stones. These can be cheaper than the larger stones already discussed, and easier to use than bricks that need to be fitted together. These are also good for areas that tend to be washed out by rain as they allow the water to travel over and through them without going with it.
Pebbles can be more expensive, however. A bag of pebbles at $1/lb may seem like a good deal, but it takes a lot of these smaller stones to cover a large area.
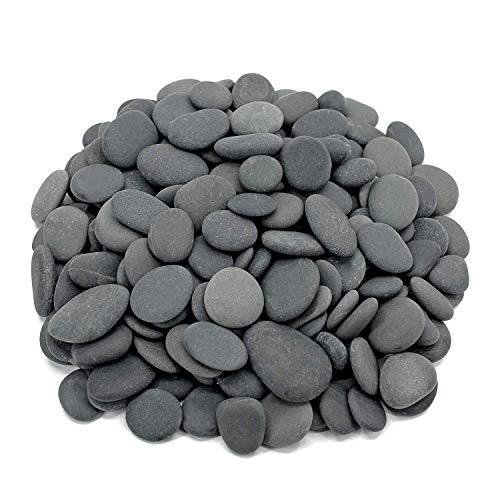
To find these pebbles on Amazon, click here.
Terracotta
Terracotta garden borders are typically fashioned out of fired clay tiles imprinted with designs. This is a classic border traditionally found in English gardens. These tiles will have the earthy orange color that's iconic with terracotta.
This border will be a bit more fragile than the previous options, though with good care they'll last for many years. Chipping and cracking are a big concern with terracotta edging, so be mindful of what kind of wear and tear your edge might have to endure.
Gravel
Gravel is a great option for garden beds. It helps to retain water under the stones, and it holds heat well, making it a good choice for colder climates.
However, this stone edging needs a good liner to help hold it in place. The liner must be at least one inch higher than the top of the gravel or it could spill out into the yard.
Also, if you layer it too thick plants that grow closely to the border may not be able to spread out as they would normally. Make sure to only use around a 2-inch high layer to avoid this problem.

To find this gravel on Amazon, click here.
Cast Stone
Cast stones are created using masonry that recreates the look of natural stone. These can be made from cement, sands, or crushed stones or gravel and colored with mineral pigments. The process used to make cast stone makes a great many options available.
It's a very durable and low maintenance option. It's also easier to work with because of its lighter weight. It's porous construction also makes it easier to cut, which in turn makes it a good choice if you need odd or unique shapes to make your planned edge work well.
However, because this is a fabricated stone, you won't find much of the details you would find in natural stone. Depending on the quality of the cast stone you use, it may also not be as durable as natural stone and can experience some color changes as it ages.
This type of stone is also normally, though not always, much cheaper than natural stone options.
Pros and Cons of Using Stone Edging
Stone edging has many good qualities that appeal to people that want to use it. However, it has some trouble points as well.
Pros:
- Stone is typically much lower maintenance than other organic edging materials.
- You don't have to replace it like you would timber or wood mulch, which makes the overall cost much lower.
- Stone is heavy, making it harder to be blown by the wind or knocked out of place by people or animals, which helps with erosion. Smaller stones, such as pebbles, can still have this problem though.
- Weeds have a harder time growing up through rock borders, especially when used with landscape liners.
Cons:
- Rocks can hold heat, creating a higher temperature in your garden. This can cause your plants to require more water and wilt easier.
- Rocks can also mess with the pH level of the soil, which can hurt trees and plants depending on their preferences.
- If you decide you want to remove the stones in your garden border, they can be tedious to get rid of. You would need to remove them by hand, and since stones are heavy they can sink down in the soil. This can make it even harder to get rid of all of them, especially with a smaller stone like gravel or pebbles.
How Much Does Stone Edging Cost?
The total cost for your particular project is dependent on several unique factors. What stone edging you chose to use, how much of it you need, and whether you install it yourself or hire a professional are all major determining factors.
On average, however, prices can range from as little as a dollar a pound for river rock or pebbles all the way up to $30-$40 a foot for cut stones installed by a landscaper.
How Do You Install Stone Edging?
When considering installing your stone edging, you could always hire a professional landscaper to do the work for you. However, installing stone edging yourself isn't a difficult project. You still need some know-how to do it right, but it's a fairly easy process once you know how to do it. Follow these simple steps to make your stone garden edge easily yourself.
1. Start by preparing your area.
Mark the area you want your stone edging to go with a garden hose. A garden hose is long and flexible, making it easy to adjust as you get it exactly how you want it. You can also see a garden hose from many different distances and angles easily, making it a better choice than using a rope or string to plot out your garden edge.
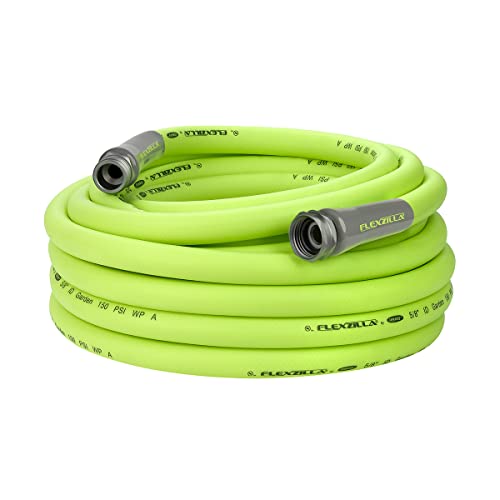
To find this hose on Amazon, click here.
2. Spray paint along the hose to mark the line on the grass.
This allows you to mark exactly where you've decided the line should be and then dig without worrying about knocking the hose out of place. When doing this step, be careful to use bright paint that you can see easily. Use red if spraying your line on grass, or bright orange. These colors are easily seen in green and brown.
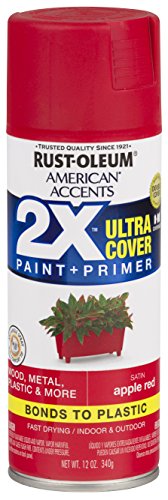
To find this spray paint on Amazon, click here.
3. Dig out the grass in the area.
You want to make sure you've removed all grass and weeds for the area. Dig out a shallow trench for your stones to rest in. You can use a shovel to remove grass and other plants, then use a pick to break up the dirt and rocks that were lying beneath them. Then use a handheld spade to remove the rest of the dirt and form your trench. Then pack the dirt at the bottom of the trench with either your foot or a block and mallet.

To find this shovel on Amazon, click here.

To find this pick on Amazon, click here.

To find this spade on Amazon, click here.
4. Fill the bare area with sand or cover with a liner.
If you chose to use a larger slab or block of rock, you'll want a sand layer to settle your stone into. If you're using smaller stones like pebbles or river rocks, you'll want a thick landscaping fabric to line the trench with before you pour them in to keep weeds or other plants from growing up in between the stones.

To find this sand on Amazon, click here.

To find this landscaping fabric on Amazon, click here.
5. Place stone edging.
At this point, you simply place the stone edging in the prepared area. If using gravel or pebbles, pour the stones into the space you've gotten ready. If using larger stones, use a rubber mallet to tap them into place and secure them against one another. Then fill in the spaces between and around the stones with soil or sand to ensure a stable edge.

To find this rubber mallet on Amazon, click here.
How to Lay Edging Blocks Video
If you're someone who prefers to see a process in action before you attempt it, we found a great video that details the steps listed above for you.
Stone Edging Examples
This is a great example of some natural cut rock that makes up a stone edge. As you can see, the landscaper used these flatter rocks stacked one on top of another to create a raised edge. This is a useful technique for keeping soil, mulch, and plants within the garden bed.
This image shows two different techniques. The first uses thin, flat stones to create a low border. The second uses larger, rounder rocks to create a simple edge that's topped with smaller border plants. Both of these edges are used to help keep the garden bed contained as well as mark the separation from the yard to the garden.
This stone edge has been constructed with mortar to hold the bricked rocks together rather than simply stacking them. This creates a much more stable edge that can withstand more pressure from soil and plants in the garden as well as provide protection.
These borders are created from much larger rocks than pebbles, yet the overall look is very similar. While it won't provide the drainage of smaller rocks, these stones will provide much protection for the soil of the bed and keep it from washing away during heavy rains.
These cut stones create a very rustic looking edge to this garden. The large shape works well to create a raised border wall for this bed while also using the natural look of the stone to add to the design of the garden.
These stones were cut into bricks to create this elegant and polished edge. While it doesn't work well as a border to hold back the soil and mulch in the bed, it does create a defined line between the yard and garden.
This garden edge uses different landscaping rocks like river rocks and pebbles to create a dual border. This type of edging is great for water drainage, especially this close to the wall of the home in the image.
This stone edge uses mortar to create a unique looking edge. The raised stones keep the bed contained, while the flat stones, called a 'mowing strip' in this design, create a great border by the grass to make it easier to mow the lawn.
The flat slate stone used here creates a wide border at ground level to allow for easier yard maintenance without disturbing the bed. This type of edge would be constructed with sand to settle the stone into place rather than a liner like you would use with smaller stones like river rocks.
These cut rocks are perfect for creating an edge for this hedge garden. The shape of these echoes the shape of the hedges, adding to the overall look of the garden while also defining the edges of the space.
These river rocks are used in a unique manner to create an interesting edge. While it's below the grass line, allowing for easier mowing, it's also allowing for drainage of excess water.
Conclusion
There are many options when considering stone edging for your garden, and even once you decide on which type of stone you want, there's even more variety for how to arrange it to suit your unique tastes. As you can see, stone is a great option for creating a look perfectly suited to your yard and garden that will last for many years. Chose from any of these great stone edging options and create a wonderful garden border that will keep your beds contained and looking lovely.