
Making your natural wreaths can be a great way to add a personal touch to your décor while connecting with nature.
Utilizing materials from your garden adds a special significance to each wreath and offers an eco-friendly and cost-effective approach to holiday decorating.
This DIY project allows you to celebrate the beauty of nature right at your doorstep creatively.
Tools of the Trade
You'll need a few tools to help you create your wreath. Some of the most essential tools include:
- Pruning shears or scissors for cutting your materials
- Floral wire or twine for attaching your materials to the wreath base
- Wire cutters for cutting your wire
- Hot glue gun for securing any loose materials
Step 1. Choosing Your Base
The base of your wreath is what gives it its shape and structure. You can use many materials for your wreath base, but some popular options include grapevine, straw, and wire.
Grapevine wreath bases are an excellent option for a rustic, natural look, while straw bases are perfect for a more traditional design.
Wire bases are the most versatile option, as they can be shaped into any size or shape you need.
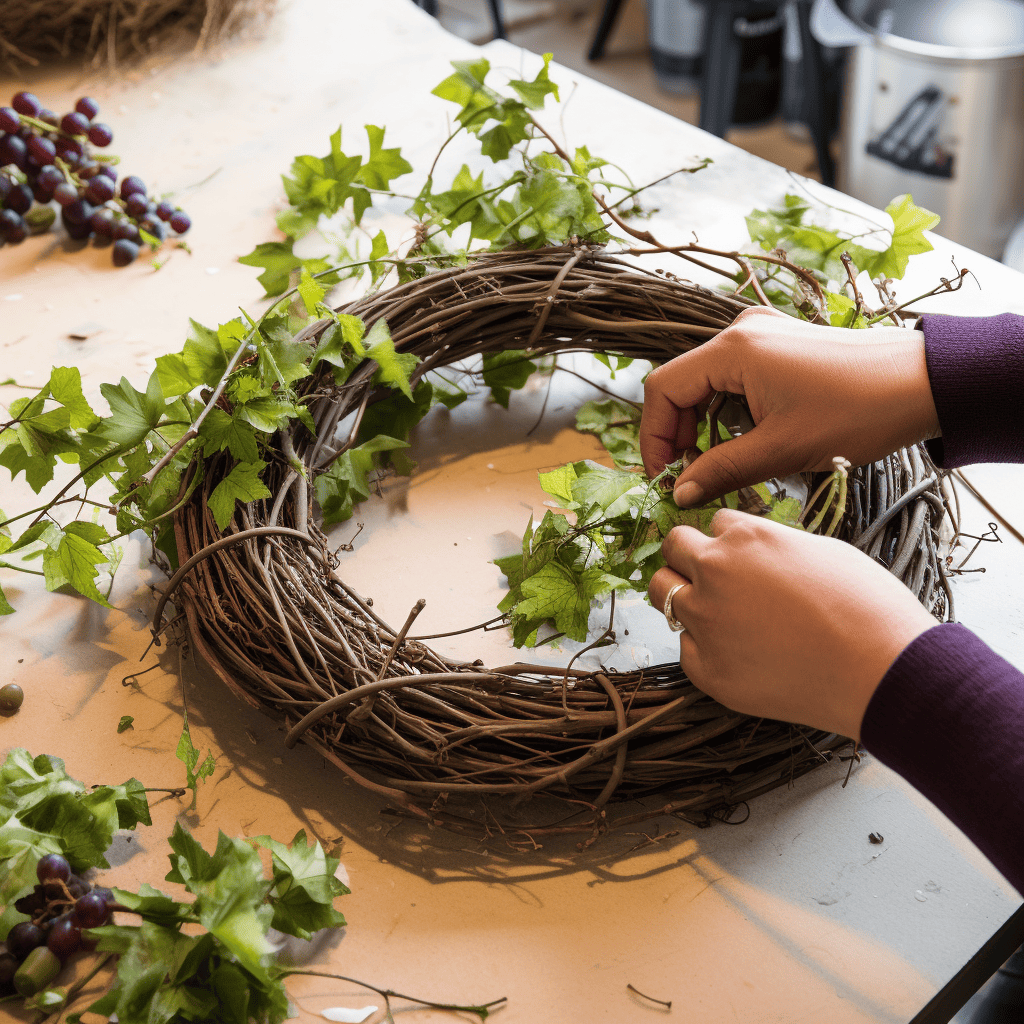
Step 2. Adding Greenery
Gather evergreen branches from your yard, nearby tree farms, or craft stores to add greenery to a natural wreath. These evergreens, such as pine, fir, spruce, or cedar, provide a lush, total base for the wreath.
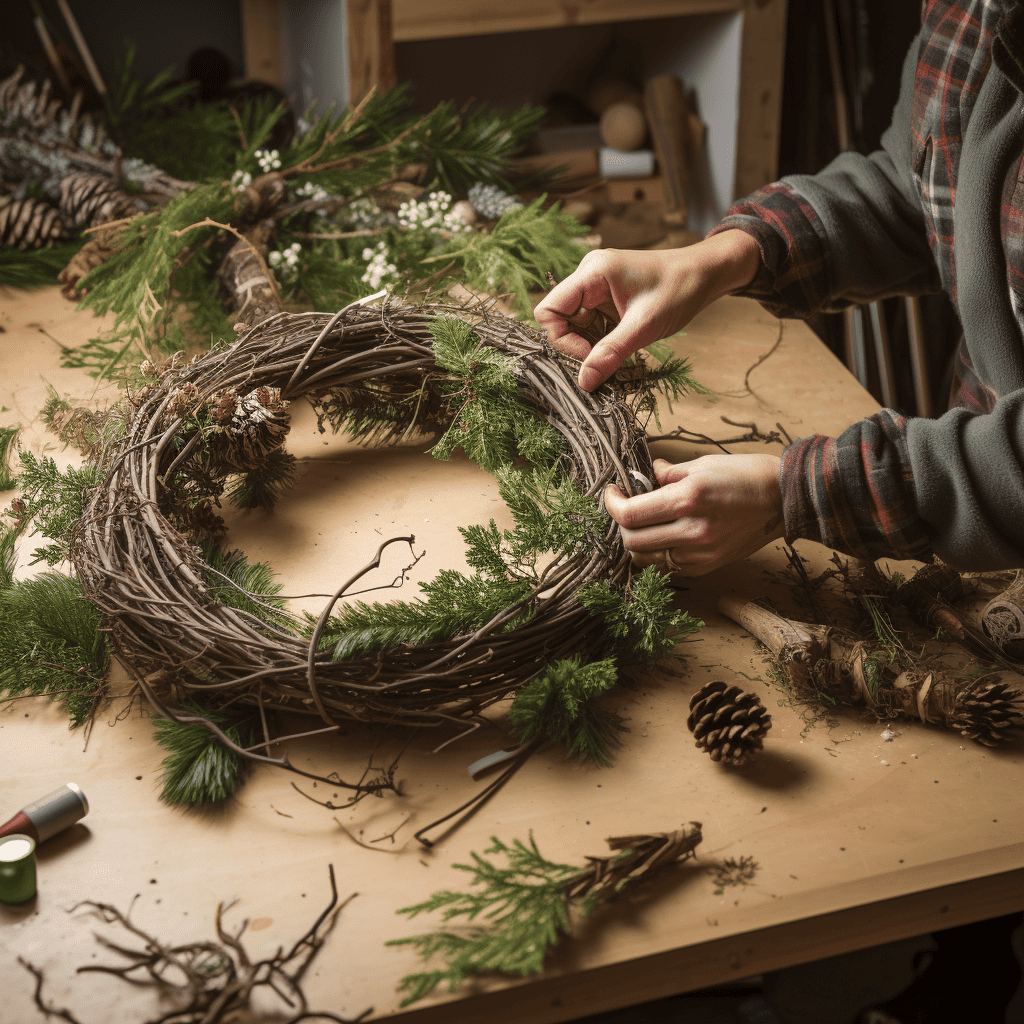
Once you have your greenery, lay the branches along the wreath base, arranging them to cover the base evenly and create a visually pleasing pattern. To secure the branches, use green floral wire.
This wire blends in with the greenery and provides a firm hold without being noticeable. Wrap the wire around the branch and the base, twisting it tightly at the back of the wreath to keep the greenery in place.
Continue this process, overlapping the branches as you go around the wreath to create a complete and natural look.
Trim any excess branches or uneven edges to maintain the wreath's shape. Remember to periodically step back and look at your wreath from a distance to ensure even coverage and a balanced appearance.
Step 3. Adding Natural Decorations
Choose a variety of berries, dried flowers, and natural items like pinecones, seed pods, or even shells for a unique touch.

Consider color and texture to create visual interest. For example, red berries add a pop of color, while dried flowers can bring a delicate and rustic feel.
Attach these elements securely to the wreath using floral wire or hot glue. Floral wire works best for berries and small items as it offers precision without being too invasive.
Hot glue can give a firmer hold for oversized items like pinecones or large seed pods.
Distribute these elements evenly around the wreath or create clusters for a more dynamic look. Balance is essential – ensure the decorations complement rather than overpower the greenery!
Step 4. Customizing Your Wreath
Adding ribbons and bows can significantly elevate its aesthetic in crafting your natural wreath. Opt for colors and styles that complement the greenery, like a festive red ribbon or rustic burlap.

A bow at the bottom of a loop at the top adds charm and practicality for hanging. Personalize your wreath by incorporating elements that reflect your interests or heritage, such as musical notes or cultural symbols.
This combination of personal touches and textural diversity transforms your wreath into a unique and meaningful piece.
Remember, the possibilities are endless when customizing your natural wreath. Have fun, and let your creativity shine!
Step 5. Preserving and Maintaining Your Wreath
After putting in the effort to create a beautiful natural wreath, you'll want to ensure it lasts as long as possible. Here are some tips for preserving and maintaining your wreath.
Keeping Your Wreath Fresh
One of the most important things you can do to keep your wreath looking fresh is to water it regularly. You can do this by misting it with water daily.
This will help keep the needles and branches from drying and turning brown. Another tip for keeping your wreath fresh is to avoid placing it in direct sunlight or a drafty area.
Too much heat or cold can cause the needles to drop prematurely, so keeping your wreath in a cool, shaded area is best.
Storage Tips
When it's time to take down your wreath, you'll want to store it properly to ensure it stays in good condition for next year. Here are some storage tips to keep in mind:
- Store your wreath in a cool, dry place. Avoid storing it in a damp or humid area, as this can cause mold or mildew to form on the wreath.
- Store your wreath in a box or container to protect it from dust and debris. You can also wrap it in plastic or a plastic bag to keep it clean.
- When storing your wreath, be careful not to crush or bend the branches or needles. You can use tissue paper or bubble wrap to help support the wreath and keep it in its original shape.
Wrapping Up
Congratulations on completing your natural wreath! It's a testament to your creativity and effort.
Natural wreath-making is wonderfully flexible, allowing you to experiment with various greeneries, flowers, and berries to make it uniquely yours.
Please take a moment to admire and tweak your creation before choosing the perfect spot to display, be it your front door, mantel, or wall.
We're excited to see your wreath!
As you delve into the art of natural wreath making, why not extend your festive creativity and eco-conscious approach to other aspects of the holiday season? We invite you to read our exclusive articles: