
Raised beds can be a great way to add structure and order to your garden that often seems permanent. However, if you need to remove them, there is a way to do it. We've done the research and are sharing a step-by-step guide to quickly and easily removing raised beds from a garden. So, let's get started!
To remove a raised bed from a garden, follow these steps:
- Pull out all the weeds.
- Use a shovel to remove the dirt that fills the raised bed's frame, and properly dispose of the dirt.
- Remove and dispose of the raised bed's side boards with a shovel and pry bar.
- Stir up the remaining dirt where the raised bed used to be, and amend it with compost or fertilizer.
- If you want to convert the space into a traditional garden bed, plant in spring or whenever is required by your plants. If you want to blend it in with the rest of your yard, plant grass seeds in the fall.
Removing a raised bed is a simple task to accomplish, but it requires some care and attention to detail. So, to make sure you are completely prepared, we've prepared an in-depth guide for you. Keep reading and you'll learn everything you need to know about removing a raised bed from a garden.
![A rustic vegetable and flower garden with raised beds. How To Remove Raised Beds From A Garden [Step-By-Step Guide]](https://gardentabs.com/wp-content/uploads/2022/11/How-To-Remove-Raised-Beds-From-A-Garden-Step-By-Step-Guide.jpg)
Removing Raised Beds From Garden
So you don't face any interruptions as you remove your raised beds, make sure you have everything you'll need before beginning.
- Shovel
- Spade
- Hoe or pitchfork
- Pry bar
- Wheelbarrow or tarp
- Compost and/or fertilizer
- Hammer and/or screwdriver
- RoundUp or another weed killer (optional)
- Soil pH testing kit (optional)
1. Remove The Weeds And Other Plants
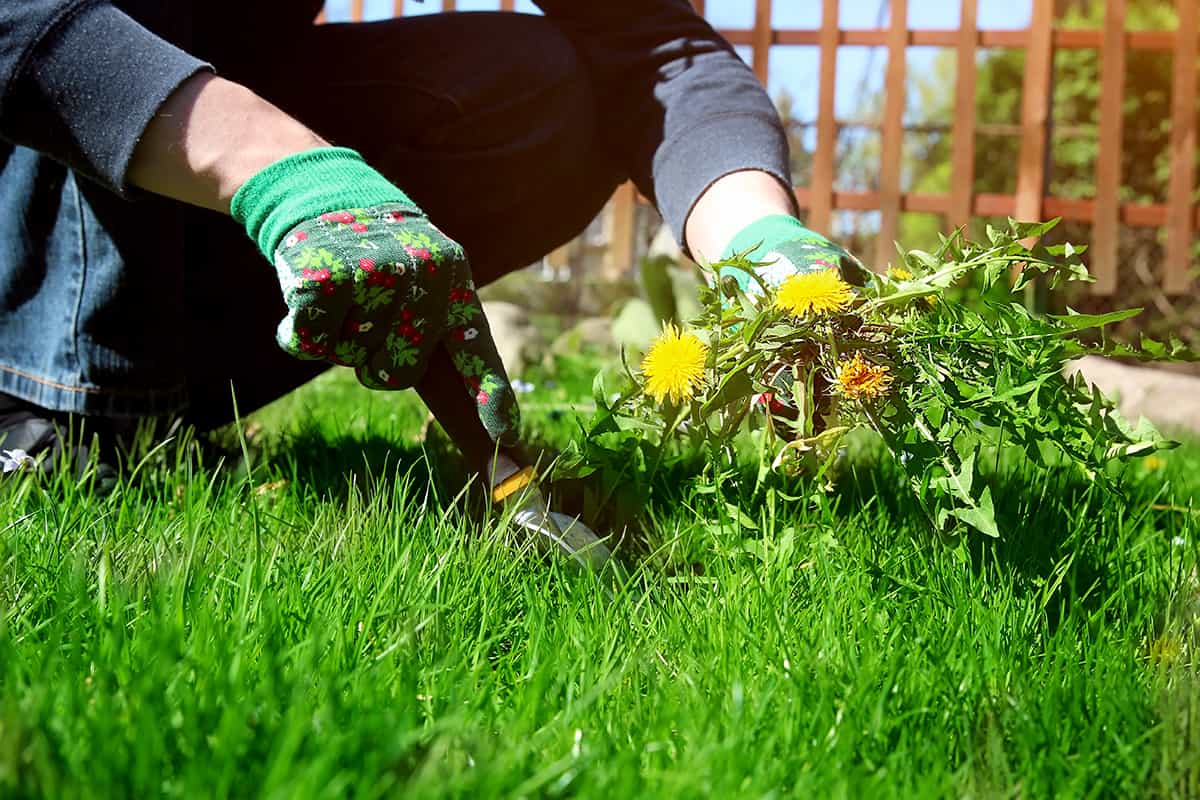
The first step is removing any plants currently growing in the raised bed. Depending on how long the bed has been unused, you might find flowers, grass, herbs, or weeds growing there. Each one requires a slightly different removal approach, which we'll explain here.
Removing Flowers, Herbs, Or Veggie Plants
If the raised bed was used recently, there might still be perennials growing there that you'd like to keep or give away to a gardener friend.
To remove the plants, carefully dig around the plants and avoid nicking the roots with your shovel. Make sure to leave some dirt around the roots as well. Smaller plants can be planted in a container until you're ready to replant them, or wrap burlap around the roots of larger ones.
Removing Grass
Your raised bed might be full of grass if it's been there for a long time. However, you can remove it easily by cutting it into strips and loosening the roots from the dirt with a shovel or spade. Roll up each piece to remove, and either use them to re-turf parts of your yard or toss them in the compost.
Removing Weeds
If the raised bed has been abandoned for a long time, it's probably full of weeds. To remove them without chemicals, start by using a pitchfork to loosen the dirt. Pull out as many weeds as you can, and then use the shovel to turn over the dirt and remove deeper roots.
If you'd like to quickly and easily remove the weeds and don't mind using chemicals, use a weed killer like RoundUp. Follow the manufacturer's directions for safe usage. You can usually plant in herbicide-treated soil after about three days.
2. Remove the Dirt
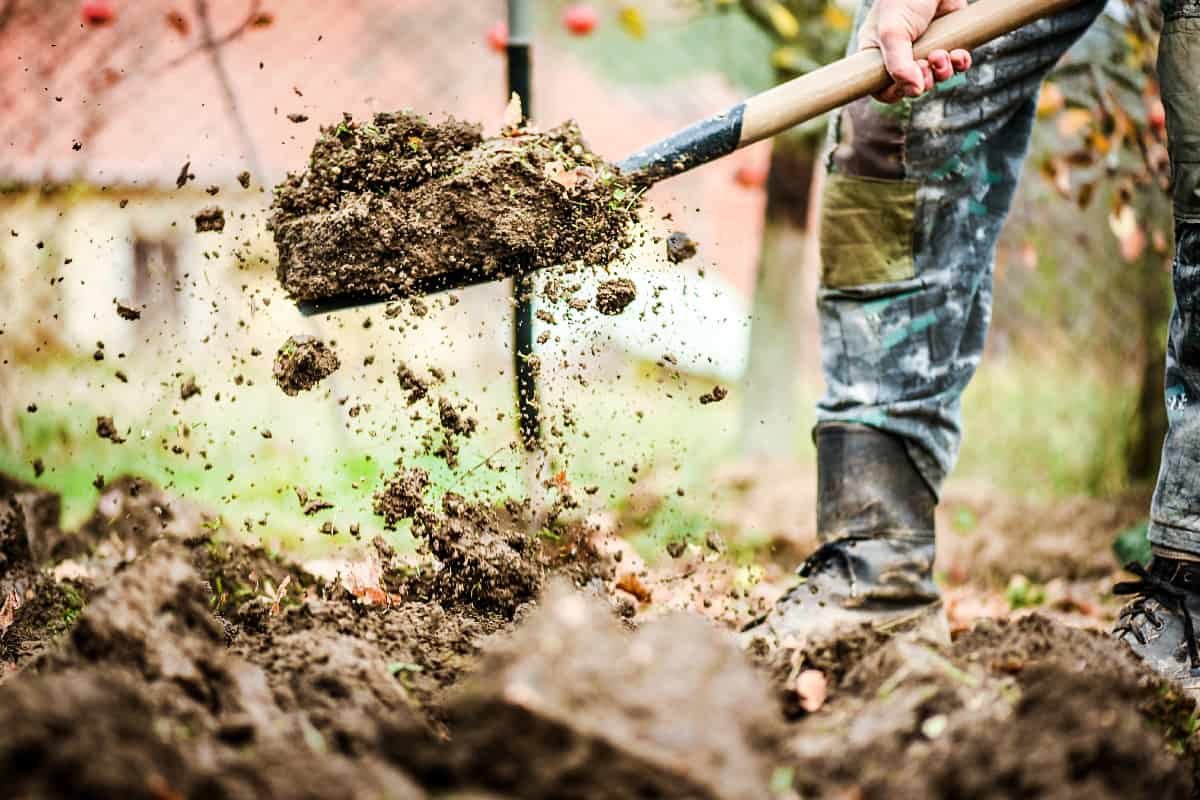
After all the plants are gone, it's time to remove the dirt. Start by using your pitchfork or a hoe to loosen the dirt so it can be removed more easily. Then, using your shovel, scoop the dirt from the raised bed into a wheelbarrow or tarp.
You can dispose of the dirt in a few different ways. If it's still in good condition without too many roots, you can reuse it. For example, you could save it to fill in holes in your yard, gift it to a gardening friend, or donate it to a community garden.
3. Remove the Boards
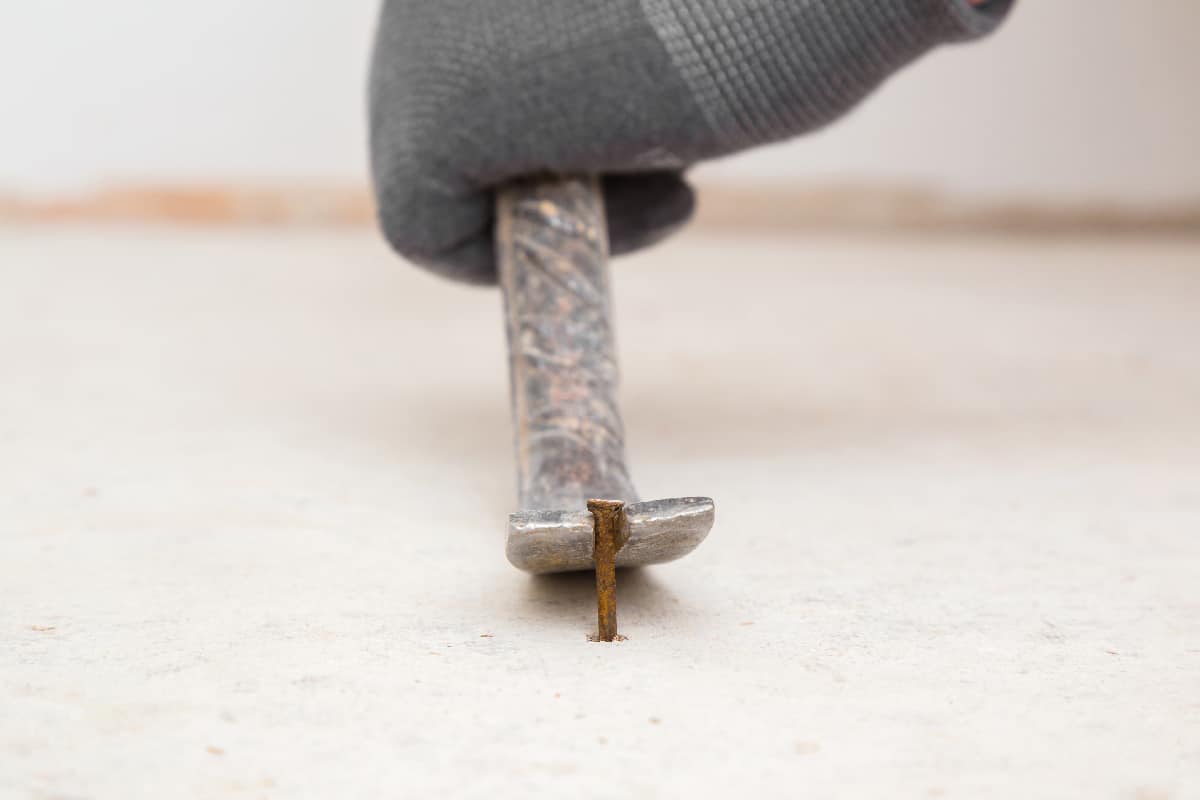
Your raised bed should now look like a large empty box. It's now time to dismantle it! The sides of wooden raised beds are often held in place by wooden pins stuck vertically into the ground. If your raised bed has these pins, use your crowbar to loosen them enough so you can pull them out of the ground.
After all of the wooden pins have been removed, it's time to take apart the box. Determine if it's held in place by nails or screws, and then use either the back of a hammer or a screwdriver to remove them.
If the boards are in good condition, you could save them to reuse for another project. Otherwise, you can add them to your compost or burn pile.
If your raised bed is made from a different material, such as metal, your dismantling procedure is a little bit different. For a metal raised bed, try prying it apart at the joins with your crowbar. If this doesn't work, use metal shears to cut the sides open. Just be very careful, as the raw metal edges will be very sharp!
4. Amend The Soil
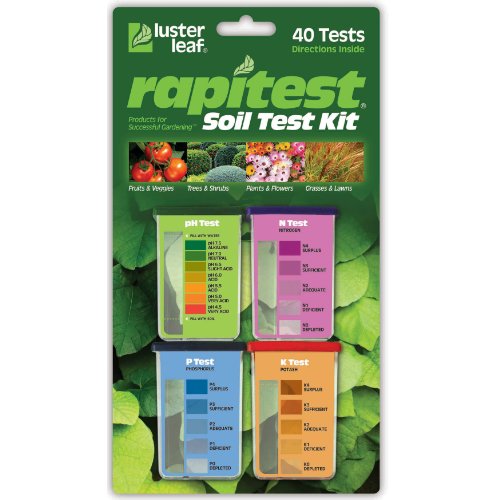
Now, all you'll have left is a large, empty rectangle of soil. Stir up the soil with your pitchfork, and then use the shovel to turn it over. When you're finished, you should have loose soil at least 6 inches deep. At this point, you have the option to test your soil's pH levels. Doing this is a good idea if you're planning to use the space for new plants. That way, you can amend the soil based on your plant's needs.
Luster Leaf's Rapitest Soil Test Kit is a great option for getting a quick, accurate reading.
Click here to see more on Amazon.
Alternatively, you can try SONKIR's pick-style Moisture/Light/pH Tester.

Click here to see more on Amazon.
Now, spread at least 2 to 3 inches of compost evenly over the soil. No matter your soil's pH level, compost is an incredible way to add nutrients to your garden. Work it evenly through the loose soil. You could also consider adding perlite at this stage if your soil needs extra drainage.
Finally, add fertilizer. 5-10-10 is a good standard for general soil and planting needs. Otherwise, you can select fertilizer based on the results of your soil pH test and the needs of the plants you'd like to grow.
Check out our article Can You Sprinkle Fertilizer On Top Of Soil? to learn more about the specifics of fertilizer and its uses.
5. Plant The Space
Last of all, you'll want to add plants to the space formerly occupied by your raised bed. If you'd like to change it into a traditional garden bed, follow the procedure for planting whatever you're planning to grow. Typically, this means planting in spring or in early fall if you're planting bulbs.
However, if you're planning to blend the former garden bed into the rest of your yard, you'll want to plant it with grass. If you're using one of the popular cool-season turfgrass varieties, you'll need to plant in the fall. Warm-season varieties, on the other hand, should be planted in spring.
Our article How Long After Tilling Can You Lay Sod Or Plant Grass? gives detailed directions on how to plant grass, so check it out if you need more information.
If you need to let your former raised bed site rest for a few months before planting, it's a good idea to cover it with a tarp or plastic sheet. That way, stray seeds won't grow and your lawn won't creep into the space.
What Is The Best Season To Remove Raised Garden Beds?
Unless the ground is frozen, you can remove a raised bed in any season. However, your best bets are early spring right after the last frost or late summer just before the season changes. It all depends on how you plan to use the space.
For instance, if you remove the bed in early spring, you'll be able to immediately plant with either new garden selections or warm-season turfgrass. On the other hand, if you remove the bed in late summer, it gives you enough time to amend the soil before planting it with cool-season turfgrass or bulbs.
In Closing
Although people often think that raised beds are a permanent garden feature, they can actually be removed with minimal trouble. Whatever your reason for removing the bed, just follow the steps we outlined above.
We hope that this guide helped you remove your unneeded raised bed and transform your garden into a more beautiful, useful space.