
Mulberry trees create an excellent focal point for any garden. They provide shade and produce delicious fruits. How can you propagate mulberries to produce more trees? Read on and find out what our research revealed.
You can grow mulberry trees from seeds but it could take up to 10 years before they produce fruit. They can be successfully propagated from softwood cuttings with a high survival rate.
Grafting and air layering are alternative methods to quickly increase the number of trees.
There are several ways to increase the number of mulberry trees in your yard or garden. The article contains the different methods and techniques as well as the steps necessary to apply them.


Mulberry Trees
The three known varieties of mulberries are:
- the red (Morus rubra), native to the United States,
- the white (Morus alba),
- and the black (Morus nigra) mulberry, originated from Asia.
All types of mulberry feature deep green serrated foliage that produces sweet berry-like fruits. Unfortunately, those varieties that came from the eastern regions tend to be invasive in some parts of the US.
How To Propagate Mulberry Trees From Seeds
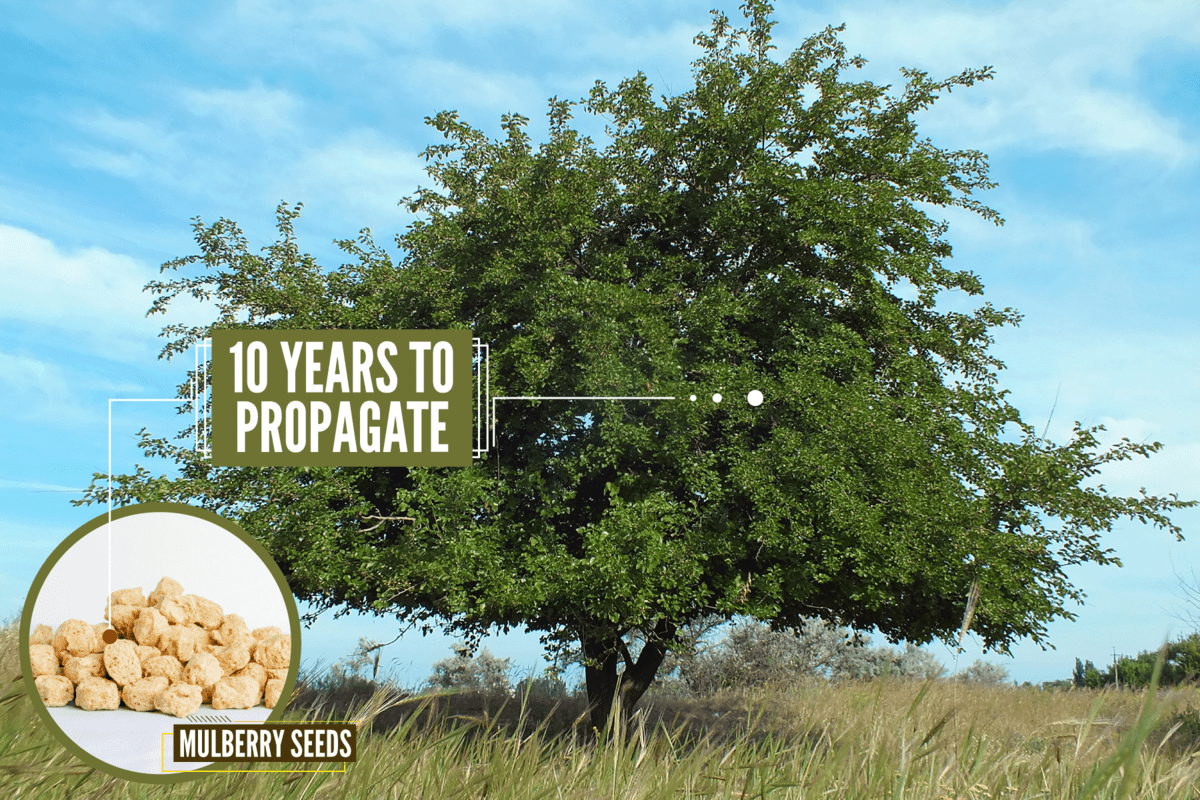
Propagating mulberries with seeds can take up to 10 years before they begin producing fruits. In most cases, mature varieties would not be the same as their parent tree. However, growing them from seedlings is an excellent way to produce rootstocks.
Steps on seedling propagation:
- First, you should gather as many fruits as you can because not all seeds will germinate successfully. If you do not own a tree, you can purchase seeds in nurseries.
- It is necessary to soak the fruits in water for at least 24 hours to soften them.
- Afterward, mash the berries so you can get the seeds. Rinse and let them dry out in a shady location outside.
- Once dry, you can begin with the stratification process – a method to break seed dormancy.
- Place the seeds in a clean paper towel or soft cotton cloth and refrigerate them for 60 to 100 days. The cold, moist temperature will break its dormancy and prompt the germination process.
- After the stratification period elapses, it is time to place the seeds in a tray filled with seedling medium to facilitate germination.
- Moisten the soil and provide the seeds with 8 hours of sunlight exposure a day.
- Water as needed.
- Check the seeds every two weeks if any sprouts begin to appear.
- Once they form roots, you can transplant them into a new container.
Note that Morus nigra is fairly difficult to propagate from seeds because some experts claim that most trees grown from this species came from female clones. Opt for the red and white varieties if you intend to grow mulberry from seeds.
How To Propagate Mulberry Tree Through Cuttings?
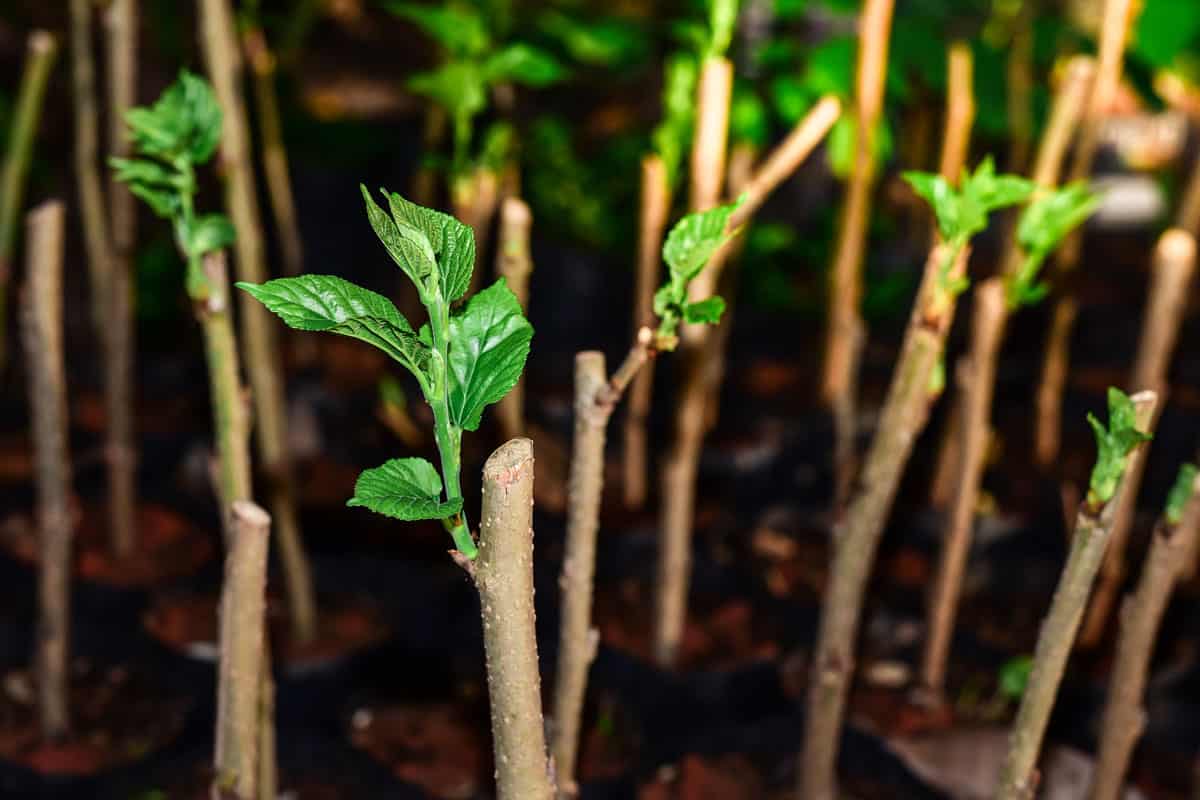
The success rate of growing cuttings relies greatly on the type of mulberry you obtain your cuttings from and the stem’s degree of maturity. Gardeners and plant enthusiasts find it difficult to grow cuttings from the red and black varieties.
The white cultivar is the easiest to propagate. However, they are proven to be invasive in some areas in the US.
Furthermore, the root formation is relatively easier on softwood and semi-softwood cuttings as long as they are given the proper growing conditions.
Steps in propagating cuttings:
- Cut stems at least 6 to 8 inches in length. The shorter the cuttings, the higher the success rate since there are fewer structures for the developing roots to nourish.
- Be sure to provide a clean direct cut near the stem’s nodes to allow the plant to heal the wound faster and prevent possible pathogens from entering from the surface.
- It is better to remove the leaves, buds, and flowers growing from the stem to allow the cuttings to focus their energy on root formation.
- Dip the cuttings in rooting hormone for a higher success rate. Prepare the growing medium by using a regular potting mix and add adequate amounts of perlite and coarse sand to facilitate proper drainage.
- Water the soil thoroughly to ensure the medium is moist. Poke the soil using a chopstick or pencil so the cuttings will not be traumatized. Be sure that the hole is enough to cover at least a third of the cuttings’ lower portions.
- Afterward, plant the cuttings onto the hole.
- If you are growing black mulberry cuttings, it is necessary to cover the plant with a clear plastic bag to maintain the ideal moisture level and temperature.
- After a month, you can begin boring holes in the plastic. If the cuttings start to wilt, cover the perforations. Begin poking the plastic again after a week if no wilting occurs.
- Regardless of variety, you should not let the cuttings be exposed to direct sunlight. Situate them in a partially lit area in your garden.
To properly care for the cuttings, regularly check soil moisture and mist the medium if the soil feels dry. Check for any sign of root formation by digging the soil. Transplant rooted cuttings in a new container to provide the roots with enough space to grow.

Get 50 black mulberry seeds on Amazon.
How To Propagate Mulberry Trees By Grafting
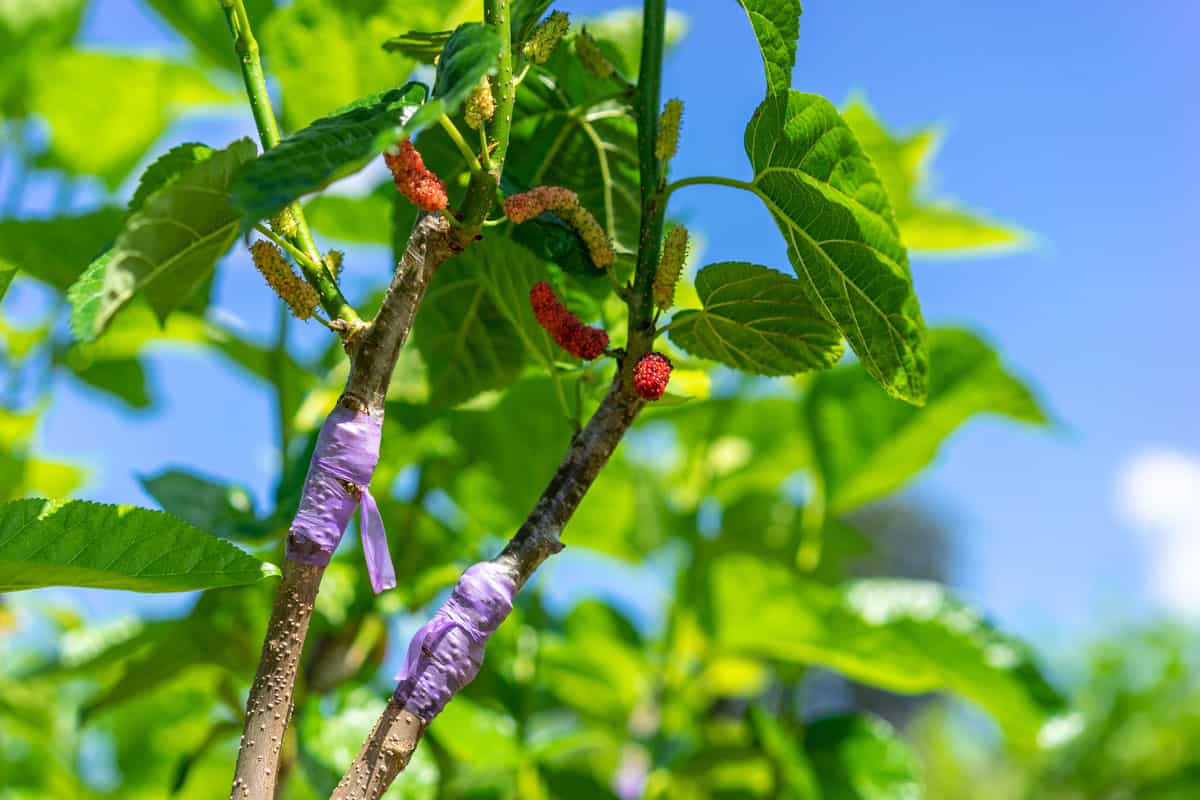
Grafting is a horticultural technique whereby a cut or bisected portion of one tree or plant is introduced or joined into a rooted, growing host of the same species. The upper portion is referred to as the scion. The base is called the stock.
The method accelerates the time of propagation associated with seed growing and stem cuttings. You can graft the scion into the parent plant or a young-rooted stock of the same variety.
Successfully grafting the joined portions depends on the adequate contact of vascular tissues. The process usually takes a few weeks to a month before the union is established.

Mulberry cultivars with a low survival rate from cuttings can be grafted onto white and red rootstock varieties.
How To Graft A Mulberry
- The scion and the stock should be the same diameter to create adequate tissue contact between the two portions.
- Cut and prepare the scion first by selecting a viable branch 6 inches long or shorter since there is a better chance of a successful graft if the rootstock has to support a small scion.
- Remove all leaves and taper the bottom part of the scion by creating a sharp or acute V-shaped incision.
- Make a vertical cut along the midline of the stock, just deep enough to accommodate the exposed, tapered portion of the scion.
- Insert the scion into the stock and wrap the joint with grafting tape or paraffin wax making sure the seal overlaps portions with intact bark.
- Tighten the joint with a layer of electrical tape, pull the stock close to the scion tissues.
- The union may be established within a month but remove the seal after eight weeks to play it safe.
- The emergence of new buds and leaflets is a better indicator that the graft was successful.
How To Propagate Mulberry Thru Air Layering
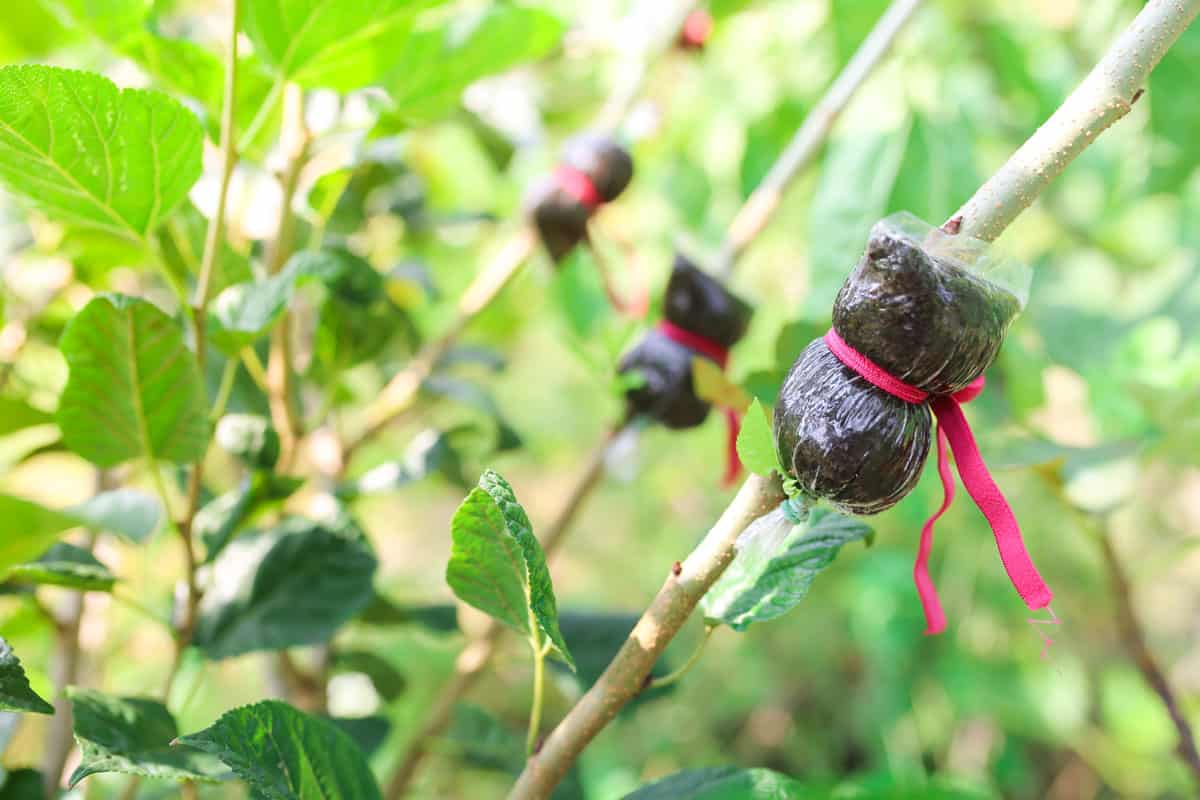
Air layering is another propagation method from stems attached to the parent tree. This method encourages root growth thru the application of soil and moss.
Put simply, seeds and cuttings are introduced into the soil to promote root development. In air layering, soil is applied to the branch to create the same effect.
The main advantage is that you can pick a relatively thick branch with lush foliage to harvest in about a year's time and grow as a separate tree.
Steps In Air Layering
- Pick a branch with a diameter of 2 to 3 inches with healthy branches and lush foliage and imagine it planted as a separate tree. Essentially, it is what you will get if the procedure is successful.
- From the foilage's apex, measure 1 to 1 1/2 feet down the branch. Mark the spot to air layer that area.
- As with cuttings, a smaller offshoot would be easier for the roots to support, and the success rate would be higher.
- Prepare damp garden soil, and moss with a small compost, plastic sheeting, and sealing tape.
- With a sharp knife or cutter, make two horizontal incisions about an inch apart around the branch over the marked portion, just deep enough to peel off the bark between the area.
- Cover the exposed or incised area with a liberal amount of the moss-based mixture and seal it with the plastic sheeting and secure it with tape.
- Monitor the amount of moisture present on the plastic covering since drying out may cause the moss to wilt and be unable to sustain the layered branch.
- You can use a large syringe to puncture the plastic and hydrate the mixture.
- The entire process can take close to a year to complete. Once the moss is consumed and replaced by visible roots, you can prune off the branch 1 to 2 inches below the rootball. Transplant your new tree.
Can You Root Mulberry in Water?
Hardened wood cuttings and even randomly selected twigs developed roots after being placed in jars filled with tap water after a month. Replace the water every week by gently pouring a new batch and letting the stagnated water to overflow.
Transplant the cuttings into seedling trays once roots emerge to transition the medium from water to soil gradually.
In Closing

Seeds, cuttings, grafting, and air layering are proven conventional methods used to propagate mulberries, other trees, and plants. Success relies on the specific tree variety and the proper execution of the steps. We hope the article helped you with the ways you could propagate your mulberry tree.
You might also find these topics helpful: