
When adding a fence to your garden or yard, you'll want to make sure your post holes are deep enough. If they're too shallow, your fence might blow over, and that's definitely not an ideal situation! If you're wondering about this, you're in the right place! We've done the research and will answer that question right here!
A fence post should be one-third to one-half of the fence post's above-ground height. This means that for a 4-foot fence post, your post hole should be a maximum of 2 feet deep and a minimum of 16 inches deep.
In the rest of this article, we'll share more information about fence posts, including the ideal width, best practices for digging a post hole, and more. So, let's get started!
How Deep Should A 4-Foot Fence Post Hole Be?

In general, you should dig fence post holes that are at least one-third to one-half of the fence post's above-ground height. To factor this in, simply divide your fence post's height inches by 2 or 3. The answer is how deep your post hole should be.
Using this formula, a fence post that is 4 feet high above ground should have a post hole that is 16 to 24 inches deep.
A deeper hole is more secure than a shallow hole. For that reason, your post holes should be one-half of your post hole's above-ground height if you live in a place that gets lots of high winds or other extreme weather.
How Wide Should A 4-Foot Fence Post Hole Be?
If you're setting your fence posts directly in the ground, the holes should be about 4 inches wider than the post hole's width. That allows for a 2-inch gap on every side of the post that will be refilled with tamped-down dirt.
If you're setting the posts in concrete, the post hole should be three times the width of the post. This means that if your post is 4 inches wide, the post hole should be 12 inches wide.

How Long Should A 4-Foot Fence Post Be?
Similarly to the depth of your post hole, the actual post should be about one-half to one-third longer than the fence's final height. So, if your fence needs to be 4 feet tall, you should purchase fence posts that are between 64 and 72 inches (6 feet) long. This gives you enough length to keep your post securely in place.
Why Does My Fence Post Need To Be So Much Longer Than Its Final Height?
Well, think about it like this. Imagine that your 4-foot fence post is buried only 6 inches into the ground. Now, imagine giving it a strong push. It will probably pop right out of the ground, because there isn't enough post underground to counterbalance the force of your push.
Now imagine that your fence post is in a hole that is 16 to 24 inches deep, and picture giving it another push. This time, the force generated by your push is counterbalanced by the length of post underground. That prevents the post from coming out of the ground, making it safe and secure.
How Far Apart Should Fence Posts Be?
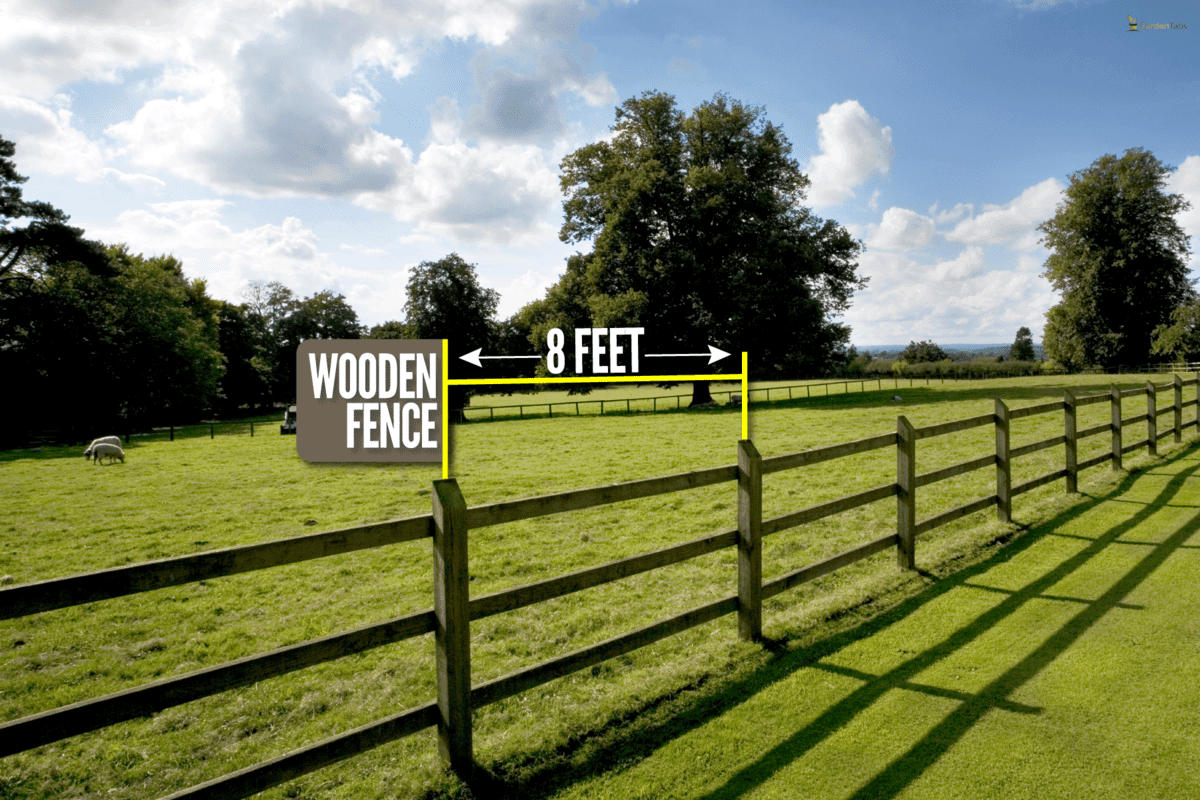
Standard fence post spacing can vary widely between 8 to 25 feet apart. Generally, however, the posts for a regular wooden fence should be 8 feet apart, while a tension wire fence could have posts spaced up to 25 feet.
How To Dig Fence Post Holes
To install a good fence, you'll need to be precise, accurate, and use the right tools. So, we're going to help you be successful with these quick instructions.
What You Will Need
- Spool of string
- Measuring tape or yardstick
- Stakes or branches (equal to the number of post holes)
- Rubber mallet
- Spade
- Wheelbarrow or tarp
- Clamshell/post hole digger
- Permanent marker
- Hammer and nails (optional)
- Tile shovel (optional)
- Reciprocating saw (optional)
- Pruning shears (optional)
- Digging bar (optional)
- Sheets of plywood or other boards (optional)
Mark Your Fence Line
First, you'll use the string and stakes to mark the exact location of the posts on your fence line. If you don't have stakes, you can also use straight, sturdy branches cut to about 1 1/2 to 2 feet long. Keep in mind that the string line you're creating will mark the outer perimeter of your fence, meaning that posts will be completely within the boundary of the string line.
Use a rubber mallet to drive a stake into the ground where you want your first fence post. Then, tie the end of the string to your stake. Now, use the measuring tape or yardstick to measure the distance to the next fence post.
Next, measure one-half of your fence post's width away from the string to find the spot to place your next stake. For example, you'll measure approximately 2 inches from the string line for a fence post that is 4 inches wide. Pound another stake into the ground at this location.
Finally, you'll need to attach the string to the stake, which can be done in two different ways. For the first option, untwist the string enough to insert a nail through it, then drive the nail into the side of the stake with the hammer. For the second option, simply loop the string around the stake.
Continue in this manner until you've marked the location of every fence post.
Mark And Loosen The Soil
Using your spade, mark a circle the same size as your eventual post hole just inside each stake. The outer edge of each hole should line up with the string line. After you've marked every post hole, remove the stakes and string. Keep the string, as you'll need to use it again.
Now, go back in and loosen the soil so it's easier to remove with your post hole digger. It may be easier to use a tile shovel for this step, since the edge is flatter and sharper. Use it to dig about six inches into each hole, slicing through any smaller roots.
To avoid damaging nearby plants, dump the soil you're digging out of the holes onto a wheelbarrow or tarp. Save it to use when you refill the post holes.
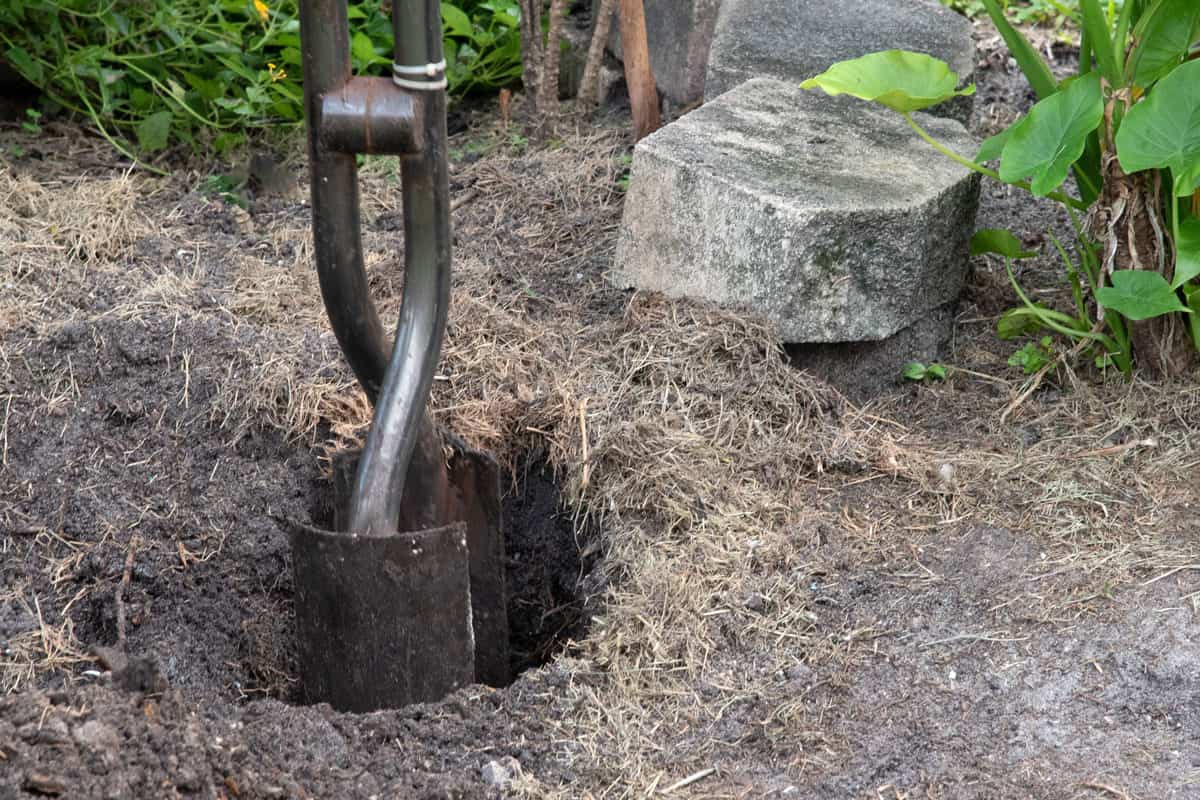
Dig The Holes
Now, it's time to use your clamshell or post hole digger to dig the full post holes. To use, simply drive the opened jaws of the digger into the area of loosened soil, then close it again and lift the excess dirt out of the hole. Measure frequently with your measuring tape or yardstick to make sure the hole is reaching the correct depth. Repeat for each post hole.
If you encounter strong roots, use a reciprocating saw or pruning shears to cut through them. Using these tools instead of the edge of your shovel will make your life much easier! However, you can use your shovel to dislodge any rocks on the sides of the hole so you can easily remove them.
Finally, tamp down the bottom of each hole with either the tamping end of a digging bar or the end of your spade's handle. This prevents the soil from settling after you've already installed the post holes and possibly destabilizing them.
Mark The Post Locations
Restring your string line using just a few stakes placed between the holes. Line the string up against the back edge of the post holes. Now, use the measuring tape to find the exact location of the post's edges. Do this by centering the post's width in between the edges of the post hole.
For example, if you dug an 8-inch hole for your 4-inch post, you'll use the measuring tape to find the 4 inches sandwiched between 2 inches on the outer edges of the hole. Using the permanent marker, mark this 4-inch segment on the string. That way, you'll know exactly where to line up your fence post when you install it.
Repeat this process for every post hole.
If you need to leave your post holes overnight or during a rainstorm, cover them with sheets of plywood or another type of board. That will prevent rain damage, small animals getting stuck, and accidentally twisted ankles!
Install Your Posts (Without Concrete)
It's finally time to install your fence posts! For the purposes of this tutorial, we'll explain how to do it without concrete.
First, place your fence post into the hole. Line it up against the string so the edges of the post match the marks on the string. It might be helpful to have someone else hold the post centered in the hole as you start to refill the hole.
Using your spade, refill the hole all around the post. Stop every few inches to firmly tamp down the soil with your digging bar or the end of your shovel's handle. Repeat for each post.
In Closing
Your fence post holes should be one-half to one-third of the fence post's total above-ground length. This provides enough underground counterbalance to keep the fence post securely upright. The post hole should also be three times wider than the post if installing with concrete, or 4" wider than the post if installing without.
As you add fencing to your garden, you might find these articles helpful, too:
How To Fill The Gap Between A Fence Post And House
Should You Add A Fence To A Retaining Wall? [And How To Do So]