Bougainvillea makes for a beautiful, hardy, and memorable addition to many gardens. Perhaps you are trying to produce a multicolored bougainvillea, or maybe you are attempting to cultivate a varietal of bougainvillea with weak rootstock. Either way, you are wondering how to graft bougainvillea. Well, you have come to the right place. In this post, we compiled all the information you'll need.
There are many ways to graft bougainvillea. Choosing the correct technique requires an understanding of the different options available combined with the specifics of your grafting situation. Three of the most popular bougainvillea grafting methods are as follows.
- Cleft Grafting
- Bark Grafting
- Approach Grafting
Keep reading the rest of this post for details on each of the above grating techniques and when to apply them. We provide everything you need to know to successfully graft a stunning bougainvillea. In addition, we conclude by answering several specific questions related to the topic of this post.
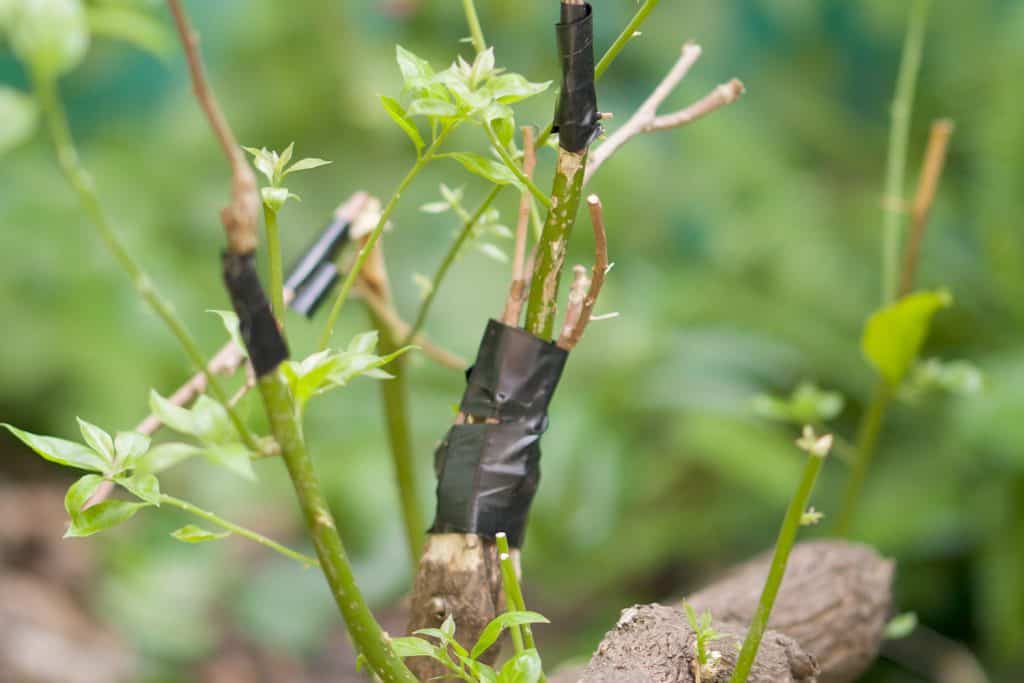
![Bougainvillaea graft is wrapped with black scotch tape in the garden., How To Graft Bougainvillea [3 Methods To Try]](https://gardentabs.com/wp-content/uploads/2021/06/How-To-Graft-Bougainvillea-3-Methods-To-Try.png)
What are Scions And Stock?
In grafting, it is helpful to understand the very common terms of scion and stock. Scion refers to the branch or small twig that is cut from a plant. The stock, or rootstock, is the established root that the scion is attached to.
Grafting Techniques for Bougainvillea

The three grafting techniques covered here all have different advantages and applications. Cleft grafting is appropriate and popular for grafting like-sized scions and stock. Bark grafting works best for grafting multiple small scions to much larger stock. Finally, approach grafting is a great way to save both the scion and stock, even if the graft does not take.
Needed Tools
All of these techniques require the same general set of tools:
- Garden saw
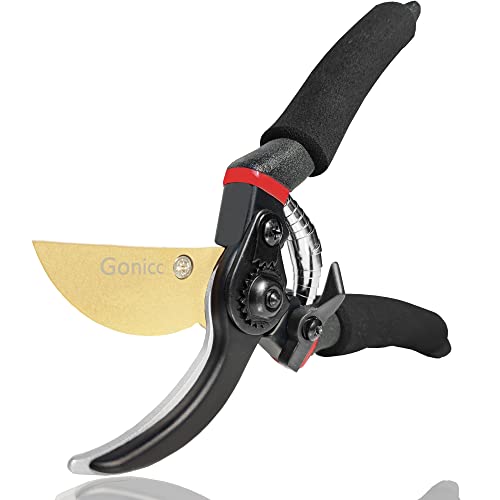
- Garden clippers
- Sharp utility knife
- Grafting tape or grafting wax
Cleft Grafting
Cleft grafting is the most popular form of bougainvillea grafting. It can be done on stock from about 1/4-inch to 2-inches. Generally speaking, this grafting method makes a pointy V out of the scion, and a deep V cut into the stock. These are then joined by grafting tape and let grow together. Depending on the scion and stock size, you can join many scions to the V in the stock.
Prepare Stock
First, clip or cut off the unwanted parts of the rootstock. Sometimes this involves cutting small twigs to match the diameter of the scion, and other times it consists of using the garden saw to cut off much larger vines. Many gardeners leave a few fresh leaves on the rootstock at this point. They cut these off once the scion takes and begins to grow on its own.
Click here for a great gardening knife that includes grafting tape from Amazon.
Now, use the utility knife or other cutting implement to essentially split the stock down the middle. Make a cut that is 2-inches to 3-inches deep. For thicker stock, it is helpful to use a wedge or a stick of some sort to hold the V open while inserting the scion.
Prepare Scion
First, clip the scion off from its original rootstock. If you are not going to perform the graft immediately, wrap the cut end of the scion in a wet paper towel. Once ready, remove all of the leaves from the scion. This encourages the scion to perform stem growth instead of leaf growth.
Click here for a utility knife from Amazon appropriate for grafting work.
Now, take the sharp utility knife and cut the scion to a 1-inch to a 2-inch tapered point, like a deep V. This cut is best performed carefully and slowly. It is much better to take off too little than to overcut the scion. If you do overcut the scion and ruin your V, you can start again higher up the scion stem.
Tape Together
Click here for grafting wax from Amazon.
Now slide the scion or scions into the V or cleft of the rootstock. Use grafting tape or grafting wax to bandage the area closed. The goal of the bandage is to hold moisture in the stems and keep sunlight, dirt, bacteria, and mold out.
Bark Grafting
Bark grafting is most appropriate for larger stock from 2-inches to 4-inches. In this method, very thin scions are slipped under the bark of the larger stock. In this way, many scion shoots can be attached to a single stock stem.
Prepare Stock
First, cleanly cut the stock stem perpendicular to the direction of growth. This works best with a sharp saw. You can cut off all extra stock growth or leave a few young shoots to help the stock grow as the graft takes hold.
Click here for a garden saw from Amazon.
Now, take your utility knife and separate the bark from the stem of the stock. The cut should be about 1/4-inch wide and 1-inch to 2-inches long. First, cut vertically down the stem, then slide the knife behind the bark to separate the bark from the stem for the length of the cut. Make three to six of these cuts around the top edge of the stock, depending on how many scions you plan to use.
Prepare Scion
For bark grafting, only prepare a scion that is 1/8-inch in diameter or smaller. This is because the scions need to be able to easily slip behind the bark of the stock. Once you have clipped off the scion, take off the first several leaves to give yourself three to four inches of working stem.
Now, shave down the scion until it is very thin. This means cutting away material on opposite sides, similar to the scion cut suggested for the cleft graft. This will create a long skinny V shape for the first inch or so of your scion.
Tape Together
Click here for grafting tape from Amazon.
Slip the scions into the many cuts on the stock stem. Once these are in the stem, securely tape or wax them in place using grafting tape or grafting wax. Now, watch your freshly grafted bougainvillea for the bark of the scion and stock to grow together. Once they grow together, you can remove the tape and take off any stock stems that you do not want to continue growing.

Approach Grafting
Approach grafting requires setting two relatively equally sized bougainvillea next to each other and preparing their stems the same way. Uniquely, this approach to grafting does not require cutting either the stock or the scion until the graft has been successful.
Preparing Scion and Stock
Cut both the scion and stock in a way that leaves about a 1-inch length of flat stem. This involves first choosing scion and stock of the same diameter. Generally, approach grafting uses bougainvillea that is 1/2-inch or smaller.
Cut about halfway into the stem and then flatten out approximately 1-inch of the stem middle. This will create a flat section with a slope back to bark on each end. Ideally, this will leave a scion and stock that can be joined together in such a way that the whole 1-inch space is firmly touching.
Tape Together
Join the scion and the stock together so that there is as much contact as possible. Now thoroughly use grafting tape or grafting wax to bandage up the connection. If you do not have wax, it is suggested that you use aluminum foil to make sure that no sunlight hits the graft area.
Prune Away Unwanted Portions
Click here for garden shears from Amazon.
Once you see bark growth from both the scion and the stock and the two branches appear well connected, you can be relatively confident that the graft has successfully taken hold. Using a pair of sharp pruners, cut the roots away from the scion and the stem away from the stock. Now you have a grafted scion onto the rootstock. If the graft does not take, continue growing each bougainvillea separately.
Which hardiness zones do bougainvillea prefer?
Generally, bougainvillea prefers USA hardiness zone 10. However, if properly cared for, they can also survive in zone 9. For more information on the types of environment and care of bougainvillea, read these two articles, "15 Vines That Grow In Shade" and "37 Outdoor Plants That Need Little Water."
What is a bract?
A bract is a colored leaf that functions to attract pollinators to flowers. For example, the brightly colored petals of bougainvillea are bracts. You can see tiny little flowers in the middle of the bougainvillea bracts groups if you look closely.
How do you graft multicolored bougainvillea?
Graft multicolored bougainvillea by using the above techniques and scions of many colors. All you need is to connect scions that are different colors than the stock and let some of the stock plant continue to grow while the scion thrives.
How do you crossbreed bougainvillea?
It is possible to crossbreed bougainvillea by cross-pollinating multiple species to get a new seed. Use a paintbrush to collect pollen from one species and place it on the flower of the other species. Once the seeds develop, plant them to see if you have created a healthy, attractive variety of bougainvillea.
Can you change the color of bougainvillea?
Bougainvillea does sometimes change color without crossbreeding or grafting. This usually happens because of different environments and nutrient availability. You can purposefully accomplish this by shifting the location or fertilizer that you give your bougainvillea.
What determines the color of bougainvillea?
The color of bougainvillea is determined by genetics, environment, and available nutrients. There are many ways to change the color, including grafting, moving your plant, and changing the fertilizer. Of these three, grafting is the method with the most guaranteed color results.
In Closing

In this post, we have provided three ways to graft bougainvillea. This includes how to prepare the scion and stock for each grafting method. Finally, we concluded by answering several questions related to the topic of this post. Good luck!


Hello,
This is not a comment but a question I’m hoping you can help with.
I’m wanting to know if you can plant two different color bougainvilleas together to make a multicolored tree instead of grafting them?